Sunday, November 14, 2010

Flip-Book Style

Painted the other side of the house today (thanks again to our ever-so-helpful neighbor!)

We got this... flip-book style!  Enjoy the transformation from drab, to fab!

-Em

                                          Before


Enter: The Mullet... in all it's glory....


Friday, November 12, 2010

Paint, Paint, and oh! More Paint!

Love my black soffits and window trim, what an AMAZING difference!

                                   Before


After


Now the boys are onto the other side of the house... scraping the mildew, removing old exterior electrical piping that is no longer being used, and painting the side, soffits, and window trim!  I am so excited!!! 


Thursday, November 11, 2010

Painting Soffits

Since the weather the last few days has been absolutely GLORIOUS, Hans has been taking half-days at work, leaving me to run the shop (whoopie-do!), while he's home doing some final exterior work before autumn arrives in full force.

So, apparently, since he did not have a ladder tall enough and someone to help him get it up there, he just hung out the 3rd story window, and scraped and painted the soffits with an extension pole and a roller.  I give him an A+ on ingenuity.

He's home again working on some more window trim and soffit painting... pictures will filter in through the weekend (sorry about the iphone quality photos right now, I'll have some nice high-resolution ones whenever I get home early enough that there is still some sunlight out).

We decided to go with all black trim around the windows, and for the soffits, with a golden-yellow for the front door.  Go bold, or go home I  say!!  (no really... go home!)


some before (left) and after (right) of the windows ... I think they look SOOO much better! (this is also just a temporary fix until our brand new windows come in, then we will be recapping all of the windows in black).


We are going to try to salvage the old copper gutters... but at the moment, it's not looking very promising... I'm pretty bummed about that really, but in the meantime, here is a before, and "after" (photoshop) of the front of the house.  The awnings will be taken down next spring, but in the meantime, we'll be painting them a gray, to blend in a bit more than the faded and striped green they currently are.
            

Tuesday, November 9, 2010

Belated Halloween

Oh, and my kitty says "Happy Be-lated Halloween"

A Slight Detour in the Renovations

ADD has struck again, another project has been started, before the first 5 have been completed.

Our back deck is in sad-sad condition.  When we purchased our home, the decking and entire back-side was engulfed in ivy, with roots the width of tree-trunks!!! (quite scary to rip down, I might add!!).


We've since removed ALL of the ivy from the house, power-washed the walls to strip the paint, and have done some painting, as I believe I've noted.  We've also since removed some of the overgrown greenery against the basement walls.

Here's a few pictures of the progress thus-far.


(A quick photoshop I did of how the basement walls will look once they are completely finished and painted)


Anyway, onto my point (there goes the ADD again...wait, what did you say?)

So, while we were removing the ivy, Hans (my boyfriend) leaned up against one of the railings, and it just FELL RIGHT OFF!!!  Fortunately, he's quick on his feet (it must be some mullet-super power), and didn't fall off with it.... So, we are now installing all new railings, and stripping (sanding with a hand-grinder!) whatever paint is left over from the last 50 years (about 3 coats of green, gray, turquoise, and a few other shades I couldn't quite make out), and resealing/repainting the entire deck.

Oh Happy Joy! another project (when will he learn that 5 projects is ALREADY more than enough?!)


So, while all of these "small" projects are going on, he also decides to tackle painting the one side of the house.  

The house had been a bit neglected (ok, VERY neglected) over the years, and about 50 years worth of dirt and mildew had built up on the exterior shingles.  I tried brushing them off, with a sponge/soap/water... but the truth of the matter is.... it's just WAY too big, and WAY too tall for that to be practical.  

Fortunately, a very nice friend of ours, loaned us his paint sprayer (and the angles sang, and the heavens opened up!).  This thing is AMAZING!!!!  

To anyone that is even entertaining the thought of painting their house... GET ONE OF THESE!!!  They are not very expensive at your local hardware store.  We used I believe the smallest model available.  We nuked out the entire side of the house in around 4 hours, total, two coats.

We used a Behr paint, that was a paint/primer all in one.  Semi-gloss white, with a mildewicide (their words, not mine!), and is paintable in temperatures as cold as 35* (Now, I don't know about you, but there is no WAY I would EVER be outside painting in 35* weather, that's just crazy-talk!).

Here's some pictures of before, during, and after.  It really is amazing how much of a difference it made on the whole appearance of the house (you will also note another man in the pictures, it happens to be the gentleman that sold us the home, lives next door, and has been kind enough to help us out with all of the outside projects we have going on.  He truly is an amazingly generous, and kind man, and I thank him greatly for that).


We will be painting the bottom exposed concrete a black/dark gray, same as the soffets and trim.  Along with putting in a raised plant bed, because we are having some drainage issues due to soil erosion against the basement walls.

That window really does look so lonely up there... doesn't it?

Tuesday, November 2, 2010

Budget Bathroom

Welcome to my 1950's bathroom!

Yes, that is a cedar closet in the bathroom... a closet that rivals the size of the one in our bedroom (and a much nicer one, at that!).

So... we have been in our home for roughly 2 months now, and I have been bathing in a half-gutted bathroom... It's AWFUL! 


 We initially were just going to replace the shower walls as a temporary fix, and focus our efforts on the kitchen... once we peeled down those fiberboard shower walls though, it was apparent that there was no easy fix for this... it had to be done first.

So... I started shopping.  I'm a craigslist'aholic, I will admit this right off the bat.  I'm addicted to a good deal.  I will NOT pay full price unless ABSOLUTELY necessary.

Now, I am in love with the antique furniture style bathroom vanities, but they are expensive.  My mom has them in her home, and I love love love LOVE them.  I don't do plain.  Sure, I can get away on the cheap with some run-of-the-mill box style... but where's the fun in that?  I'm willing to spend a little bit extra on what I REALLY want.  Style and function... I needed both... there in lies my problem... in a 52k home, I can't justify a $15k+ bathroom.  This needed to be a $5k remodel... TOTAL.  

OK... I can do this.

So... I had a style in mind, antique, with a twist of coutry charm, but with a modern touch.... simple enough, right?

After a month of searching incessantly, I FOUND IT!!!  The vanity of my dreams.  But it had a cracked granite top... bummer.  $1700 from Home Depot, Pegasus Estate Vanity in Mahogany... I scored it off craigslist for $600, no top, but with both sinks, brand new.   (I ordered a replacement black/chocolate granite top through Home Depot for $400+ $150 freight shipping.... with 10% off, I ended up paying $515 after tax) So, we drive 2 hours to NJ to pick it up.

Turns out, he has this tub.  Now, we were looking at Kohler Archer tubs, the drop in, so we could build a custom surround, and tile it.  Turns out... the tub he has, is a Kohler Archer Jet Tub, with an apron.  He said he wants $400.  Since it wasn't EXACTLY what I wanted (GAH!), I told him I'd do $300.  DEAL.  (It's a $750 tub through Home Depot).


Then we get our slate tile.  50% off!  Our toilet, now... this was my splurge.  $300 + the quiet-close lid (another ~$45)... but it was a MUST HAVE!  Kohler Memoirs 2 piece comfort height.  (Yea, I got 10% off that as well... thank you Home Depot for accepting Lowe's coupons... my tip of the week... bring competitors coupons, they will usually/always accept them!)

The only items we paid full price for, was the faucets my boyfriend fell in love with.  I'm not gonna lie... he's got good taste, they look stunning.

Anyway, here's everything laid out, with our at-the-moment color choice for the walls... I'm not sure if I'm thrilled with it... I was also considering a sage-green'ish color.  What do you think?

We're also going to be retrofitting a hot-water radiant heat flooring system since we currently have hot water baseboard heat... which I HATE!  They are such an eyesore.  

So far, we're under our budget, and should still come in around the $5k mark even after the radiant heat flooring.  I'll keep you updated on how well our budget stays once the work gets under-way... in roughly a week or two.

Any thoughts or ideas are always welcome!  

Thanks!
Em


Tuesday, October 26, 2010

The Bargain Buy

Just like anyone else, I love a great deal.  That's how we got our house.  It was listed on a Monday, we had an offer in on Wednesday, and they accepted our offer on Thursday, we closed 3 weeks later.

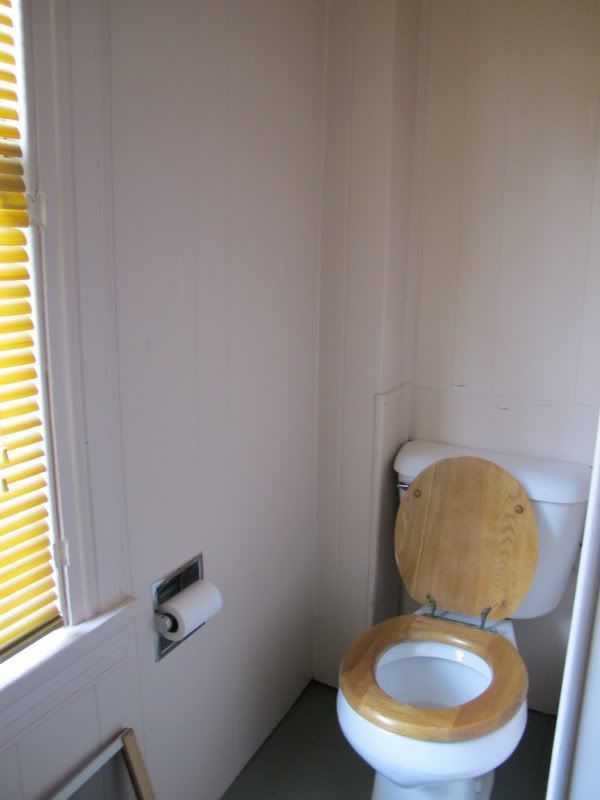
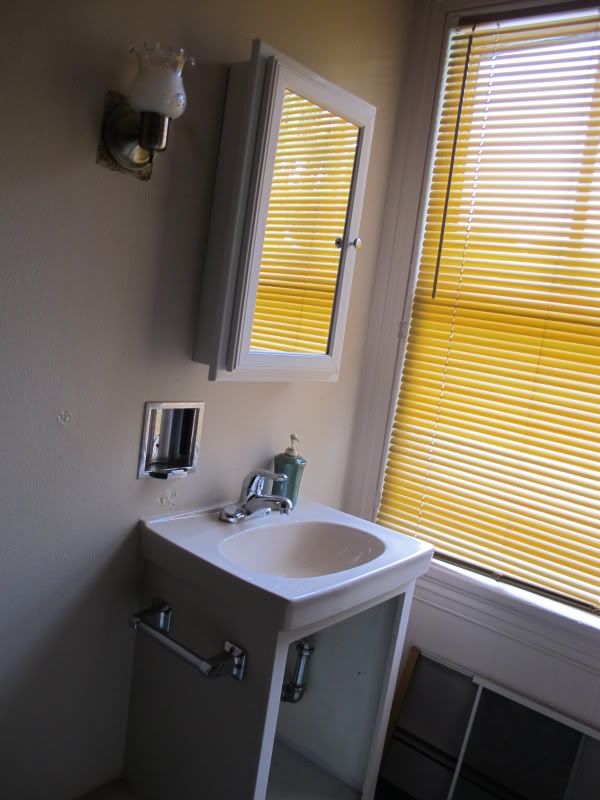
Our home is a two bedroom, one bathroom 1900's home, that looks like a time capsule from the 1950's.  Yellow linoleum in the kitchen, peach and green in the bathroom, and mauve and hunter green in the bedroom, with a splash of pink.  It's AWFUL.  

But... it has a great layout, with a beautiful yard... and best of all... a man-cave.  

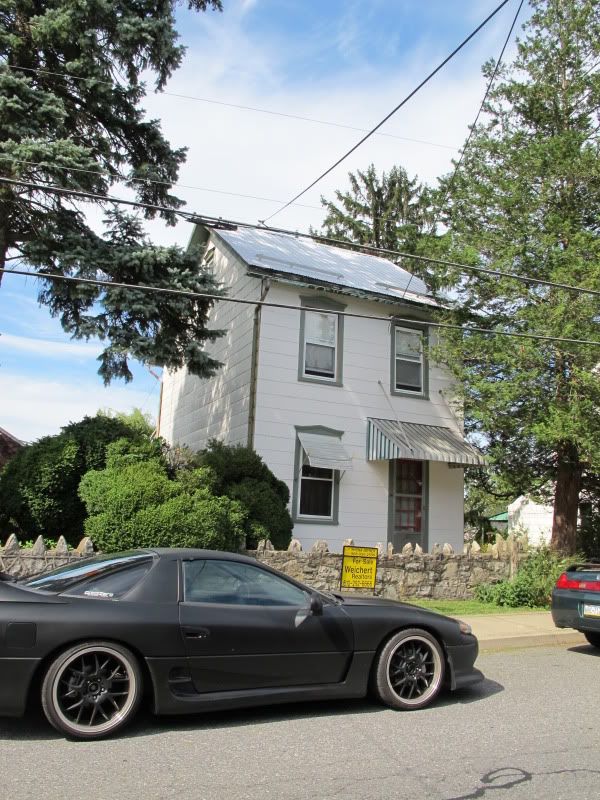
We purchased our home for $52,000.  It's approximately 1200sq/ft, on a "double lot", with a lot of charm, in need of some dire upgrading.

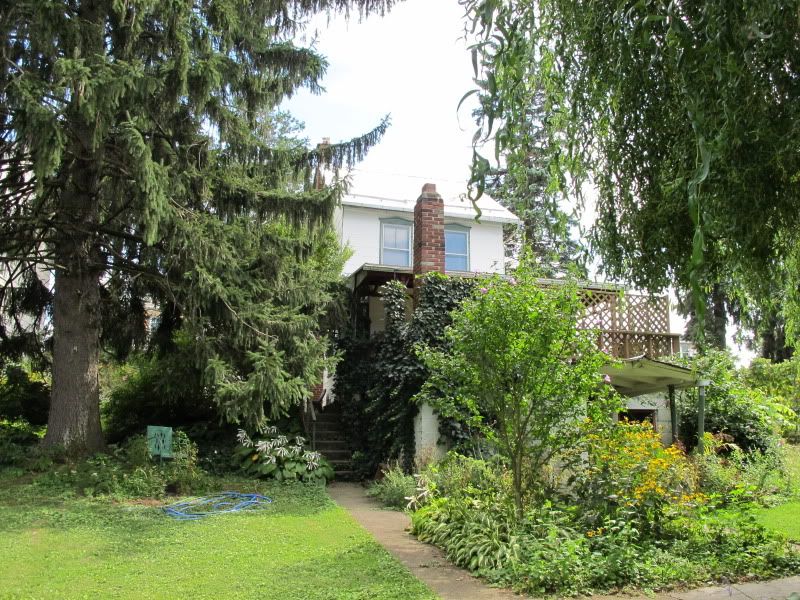
This is our home, the day we went to look at it.  It's nothing spectacular, but the potential is there.... with a lot of sweat, love, vision, and long hours.


As you can see, the bush has absolutely OVERWHELMED the front of the house, swallowing up a good portion of it.  Most of the greenery is overgrown, and in dire need of some pruning, weeding, and cutting back.

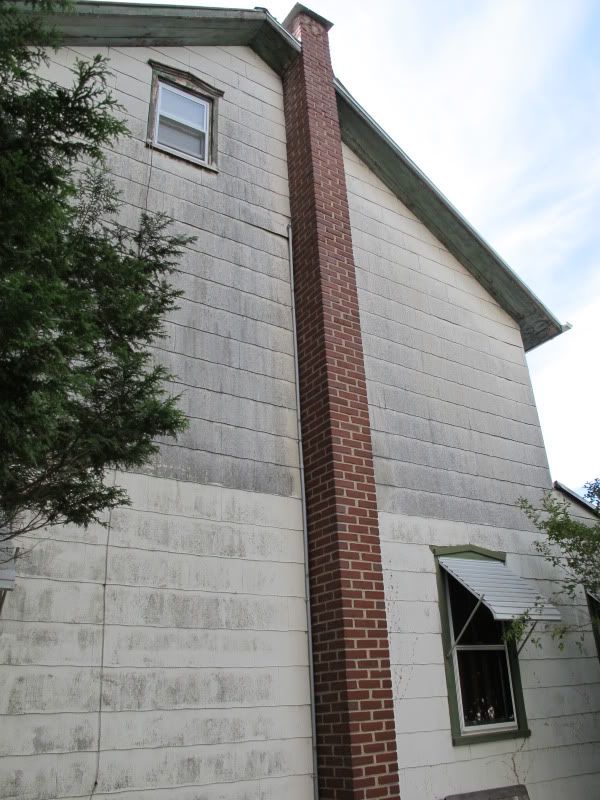
The exterior needs a good cleaning, and repainting as well.  I believe those are copper strips along both front corners of the house as well (along with copper gutters).

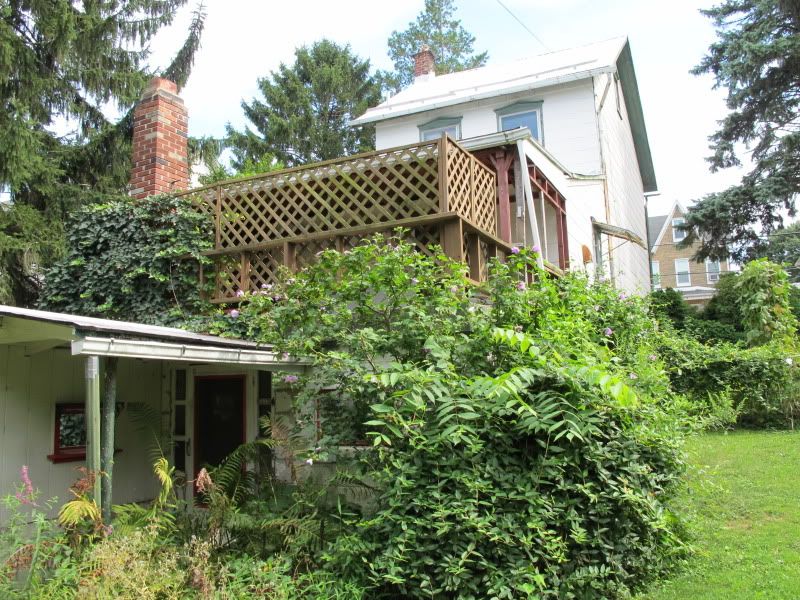
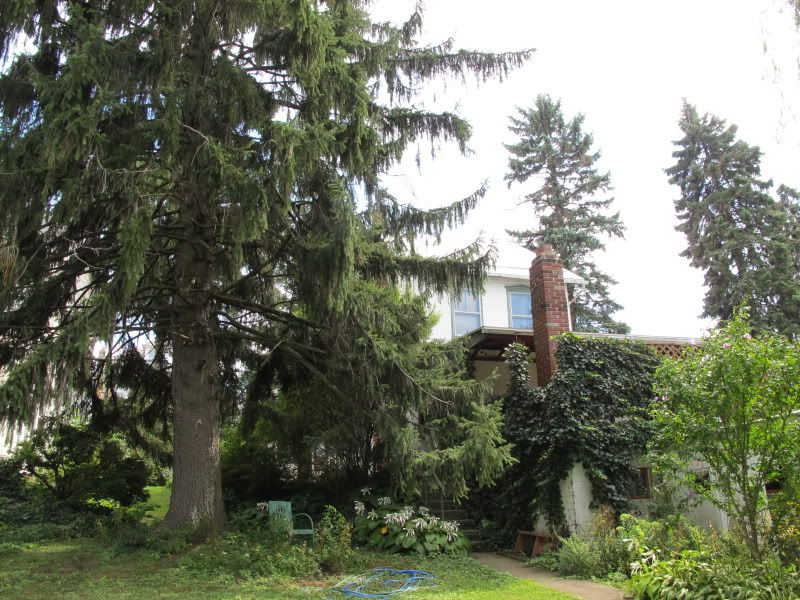
View from the back.  You can also see the ivy and overgrowth in the backyard.  It's just out of control, and swallowing up the house.


----------------------------------------------------


Step 1: Install secure front door

The original front door... did not lock.  A good push was all you needed to get into the house.  So... my mom dragged us out to pick out a new door... on a budget of course.  

$300 was our limit.  And we spent 2 full days, running from store to store, looking at what they had.  I, of course, wanted a unique front door, with a little modern touch, but something that still accented the homes 1900's charm... a large order for such a small budget.

Lo and behold... stuffed in a corner, on special, was our door.  $380'ish.  We noticed a scuff on the front, and asked if there was anything they could do about that... they took an additional 10% off.  My mom had a coupon on top of that as well.  We came out of there spending $303 on our new front door.  I was in love.

So.... we got to cutting.


In it goes, while his mom steals some food off the grill!


We picked up some oil rubbed bronze hardware for the front door (10% off, of course), and here is our first upgrade in all it's glory..


---------------------------------------------------


Step 2: De-Ickify the basement


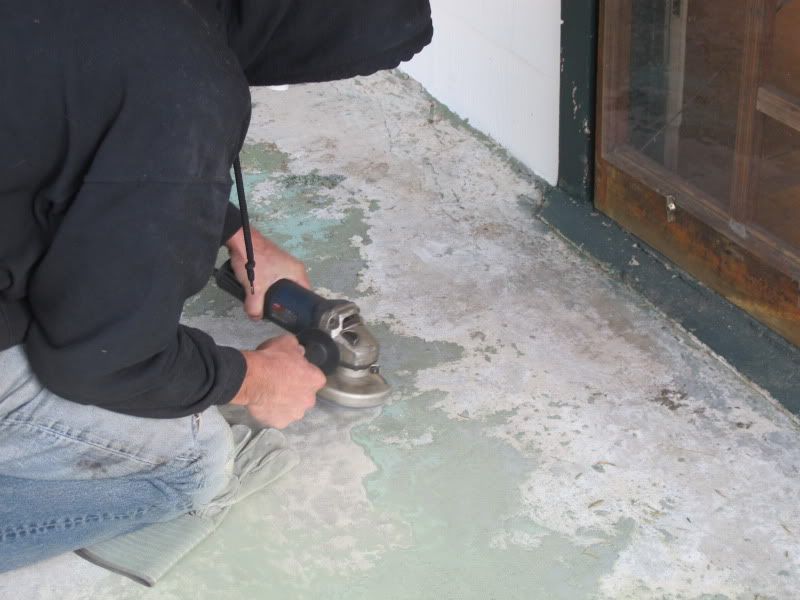
Due to a string of cold weather, we started doing some cleaning in our basement.  We have a stone foundation, and the basement was just plain creepy.  There were little wiggly million-leg bugs, and spiders, and dirt everywhere.  I'm not a fan of bugs or dirt, so, this had to be fixed, ASAP.


Here's what our basement looked like when we moved in


(washer and dryer, courtesy of his parents! THANK YOU!)


Sledgehammers in hand... we got to work, removing the make-shift work bench, old shelving, and misc stuff left behind (his sister and "the dude" came over to help, thanks so much!)


(I have to say, smashing that sledgehammer is a GREAT feeling!)


Now that the junk was cleared away, we got to sealing the walls with a fibergass reinforced concrete... Great stuff!


It's so much more sanitary feeling downstairs now.  I don't get grossed out when I go down to do laundry.  Once we have all of the walls finished, we'll prime and paint them with a mildew resistant paint/sealant.  A HUGE difference for just the cost of concrete and some paint.

-------------------------------------------------

Step 3: Bush Trimming

Since the weather warmed up a bit, we took the opportunity to do some exterior work.

So we did some sprucing up in the front "yard".  Cleared out the ratty weeds and overgrown mums, and planted some new colorful mums, and did some slight rearranging, and added some seasonal decorations. (oh, and we added a mailbox and new light fixture over the front door.)


Now... back to that monstrosity of a bush.


It was slowly swallowing up our house, and we finally bit the bullet, and broke out the sawzall.


After a few hours of cutting and clearing, and cutting some more... we finally conquered the bush!

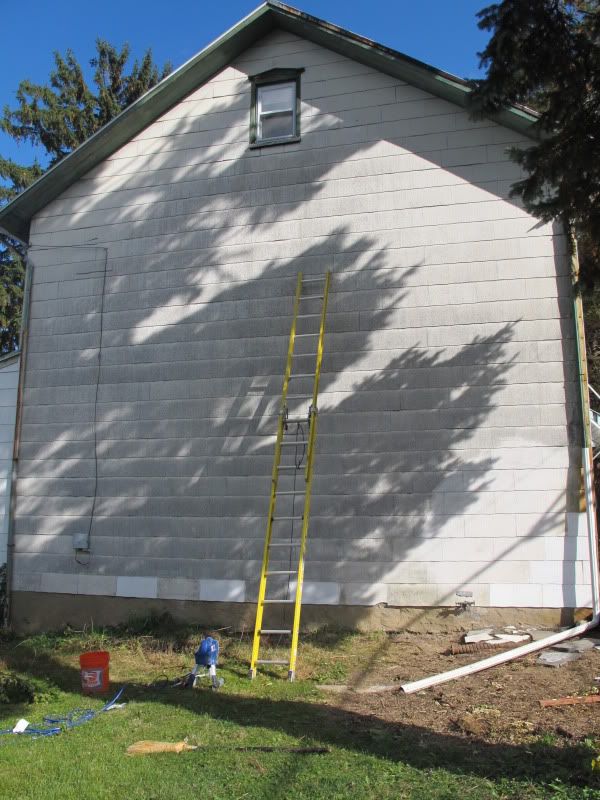
We found the side of our house!!! (please try to disregard the awful dingy paint!!)

It took 3 truck loads to get rid of the bush.


  Come to find out, it was over 100 years old!!!  Unfortunately, it was just entirely too overgrown to keep.  If someone had trimmed it during the last 100 years, maybe we would have been able to keep it.  Oh well.  We are planning a nice flower bed with a small retaining wall along that side of the house to spruce it up a bit.

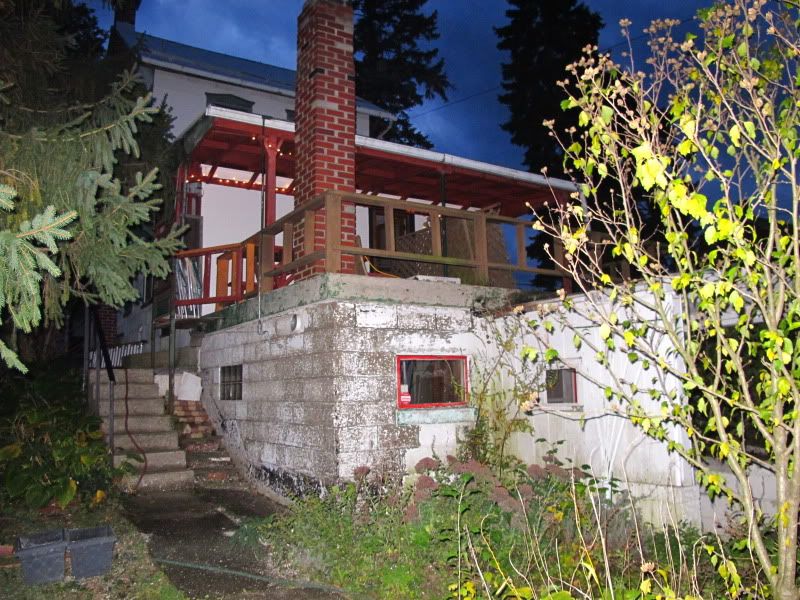
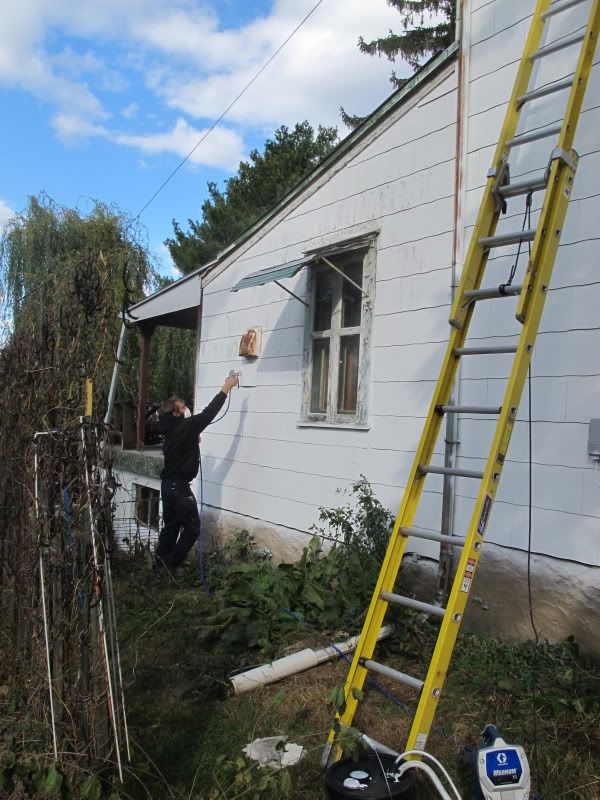
Now, about that back yard.  There were ivy vines as thick as tree trunks snaking their way up the exposed basement walls and up onto the back deck, wrapping it's way around the lattice work someone had haphazardly installed at some point many years ago.  It had to go... So we got the cutting shears out, and started pulling and snipping away.


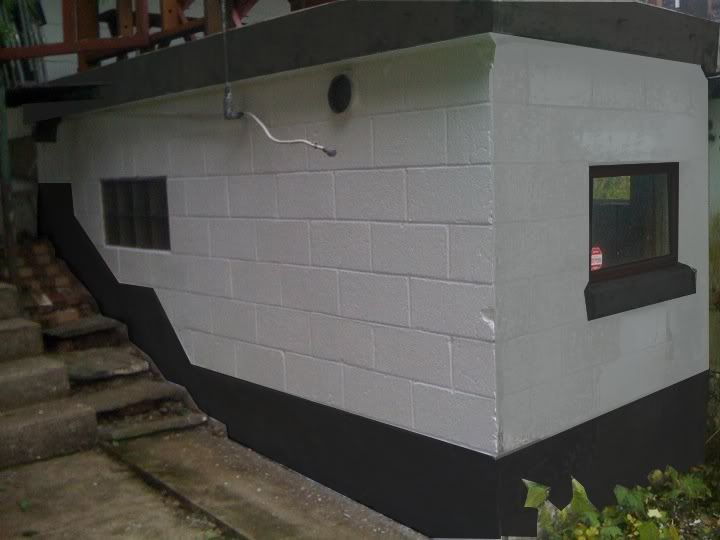
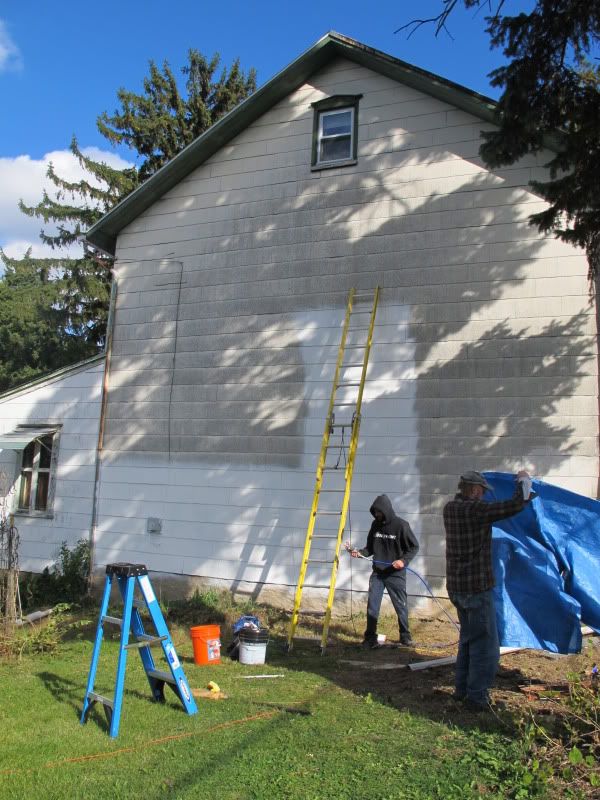
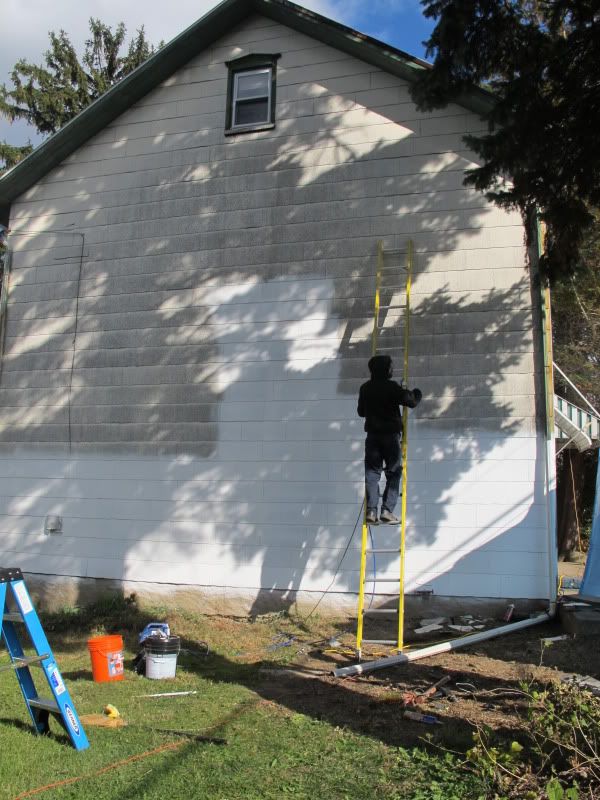
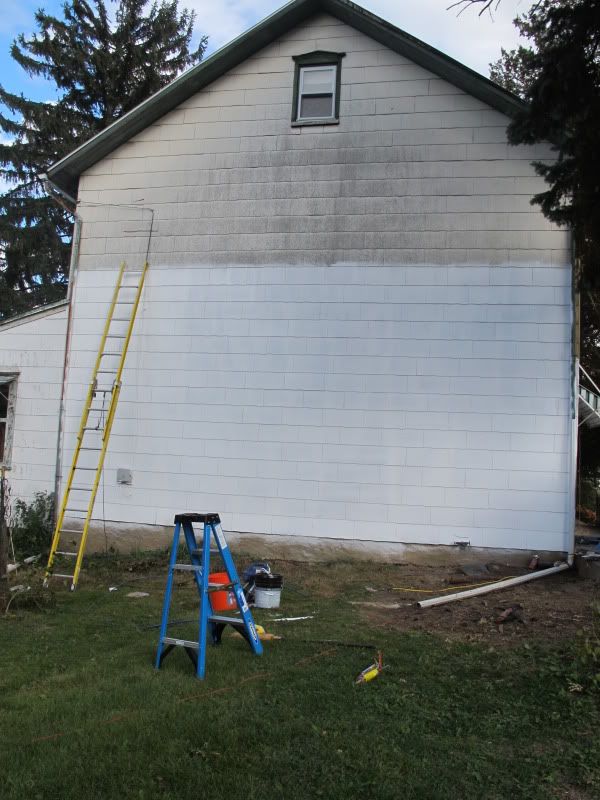
He broke out the power washer, and stripped all of the old, loose paint off, so we can lay down a nice fresh coat of white paint, with a dark gray/black trim, and a dark gray paint for the deck floor.  We haven't decided what we are going to do about the railings on the deck yet, since they're pretty flimsy, and most certainly not up to code right now.


The painting has begun...