Our home is a two bedroom, one bathroom 1900's home, that looks like a time capsule from the 1950's. Yellow linoleum in the kitchen, peach and green in the bathroom, and mauve and hunter green in the bedroom, with a splash of pink. It's AWFUL.
But... it has a great layout, with a beautiful yard... and best of all... a man-cave.
We purchased our home for $52,000. It's approximately 1200sq/ft, on a "double lot", with a lot of charm, in need of some dire upgrading.
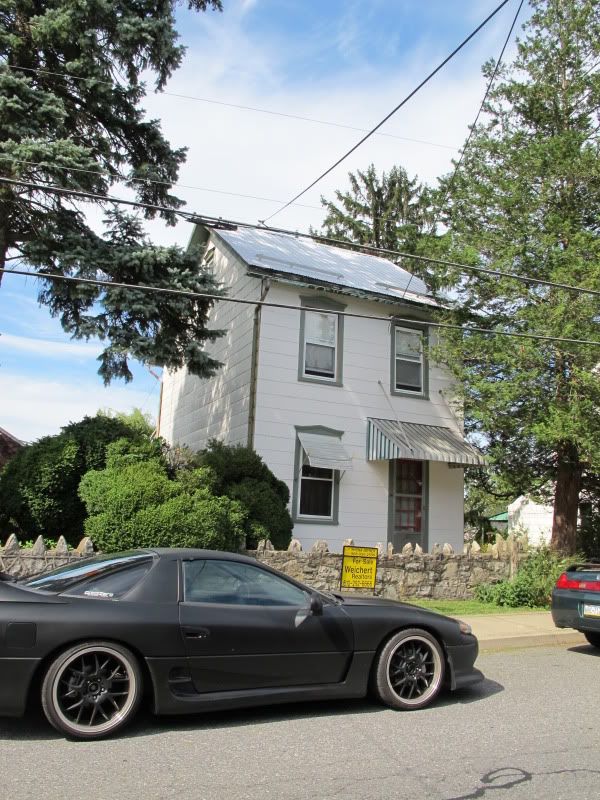
This is our home, the day we went to look at it. It's nothing spectacular, but the potential is there.... with a lot of sweat, love, vision, and long hours.
As you can see, the bush has absolutely OVERWHELMED the front of the house, swallowing up a good portion of it. Most of the greenery is overgrown, and in dire need of some pruning, weeding, and cutting back.
The exterior needs a good cleaning, and repainting as well. I believe those are copper strips along both front corners of the house as well (along with copper gutters).
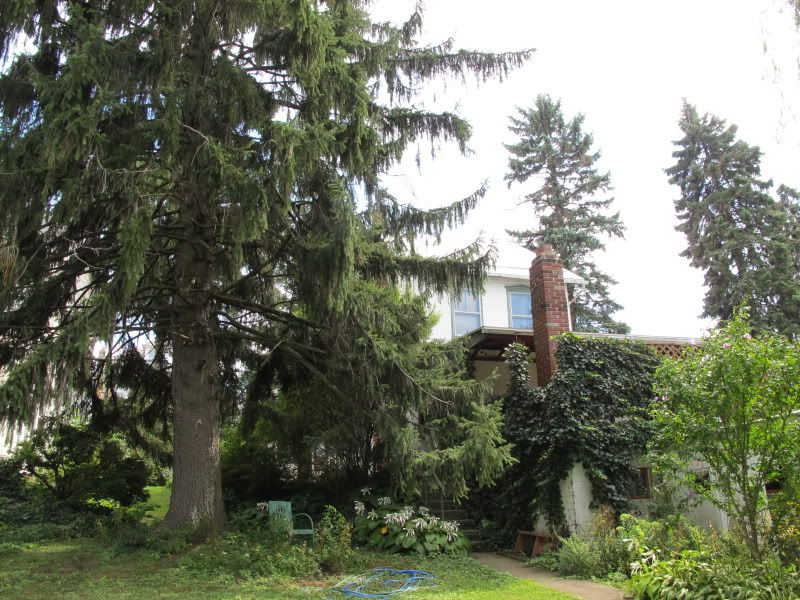
View from the back. You can also see the ivy and overgrowth in the backyard. It's just out of control, and swallowing up the house.
----------------------------------------------------
Step 1: Install secure front door
The original front door... did not lock. A good push was all you needed to get into the house. So... my mom dragged us out to pick out a new door... on a budget of course.
$300 was our limit. And we spent 2 full days, running from store to store, looking at what they had. I, of course, wanted a unique front door, with a little modern touch, but something that still accented the homes 1900's charm... a large order for such a small budget.
Lo and behold... stuffed in a corner, on special, was our door. $380'ish. We noticed a scuff on the front, and asked if there was anything they could do about that... they took an additional 10% off. My mom had a coupon on top of that as well. We came out of there spending $303 on our new front door. I was in love.
So.... we got to cutting.
In it goes, while his mom steals some food off the grill!
We picked up some oil rubbed bronze hardware for the front door (10% off, of course), and here is our first upgrade in all it's glory..
---------------------------------------------------
Step 2: De-Ickify the basement
Due to a string of cold weather, we started doing some cleaning in our basement. We have a stone foundation, and the basement was just plain creepy. There were little wiggly million-leg bugs, and spiders, and dirt everywhere. I'm not a fan of bugs or dirt, so, this had to be fixed, ASAP.
Here's what our basement looked like when we moved in
(washer and dryer, courtesy of his parents! THANK YOU!)
Sledgehammers in hand... we got to work, removing the make-shift work bench, old shelving, and misc stuff left behind (his sister and "the dude" came over to help, thanks so much!)
(I have to say, smashing that sledgehammer is a GREAT feeling!)
Now that the junk was cleared away, we got to sealing the walls with a fibergass reinforced concrete... Great stuff!
It's so much more sanitary feeling downstairs now. I don't get grossed out when I go down to do laundry. Once we have all of the walls finished, we'll prime and paint them with a mildew resistant paint/sealant. A HUGE difference for just the cost of concrete and some paint.
-------------------------------------------------
Step 3: Bush Trimming
Since the weather warmed up a bit, we took the opportunity to do some exterior work.
So we did some sprucing up in the front "yard". Cleared out the ratty weeds and overgrown mums, and planted some new colorful mums, and did some slight rearranging, and added some seasonal decorations. (oh, and we added a mailbox and new light fixture over the front door.)
It was slowly swallowing up our house, and we finally bit the bullet, and broke out the sawzall.
After a few hours of cutting and clearing, and cutting some more... we finally conquered the bush!
We found the side of our house!!! (please try to disregard the awful dingy paint!!)
It took 3 truck loads to get rid of the bush.
Come to find out, it was over 100 years old!!! Unfortunately, it was just entirely too overgrown to keep. If someone had trimmed it during the last 100 years, maybe we would have been able to keep it. Oh well. We are planning a nice flower bed with a small retaining wall along that side of the house to spruce it up a bit.
Now, about that back yard. There were ivy vines as thick as tree trunks snaking their way up the exposed basement walls and up onto the back deck, wrapping it's way around the lattice work someone had haphazardly installed at some point many years ago. It had to go... So we got the cutting shears out, and started pulling and snipping away.
He broke out the power washer, and stripped all of the old, loose paint off, so we can lay down a nice fresh coat of white paint, with a dark gray/black trim, and a dark gray paint for the deck floor. We haven't decided what we are going to do about the railings on the deck yet, since they're pretty flimsy, and most certainly not up to code right now.


No comments:
Post a Comment